Tutorial microappdata
This tutorial will help you to learn how to interact with the Buzzy API endpoint microappdata.
Prerequisites
To work with this tutorial you will need a version of postman. In addition a user with password that has access to a Buzzy server is required.
Steps
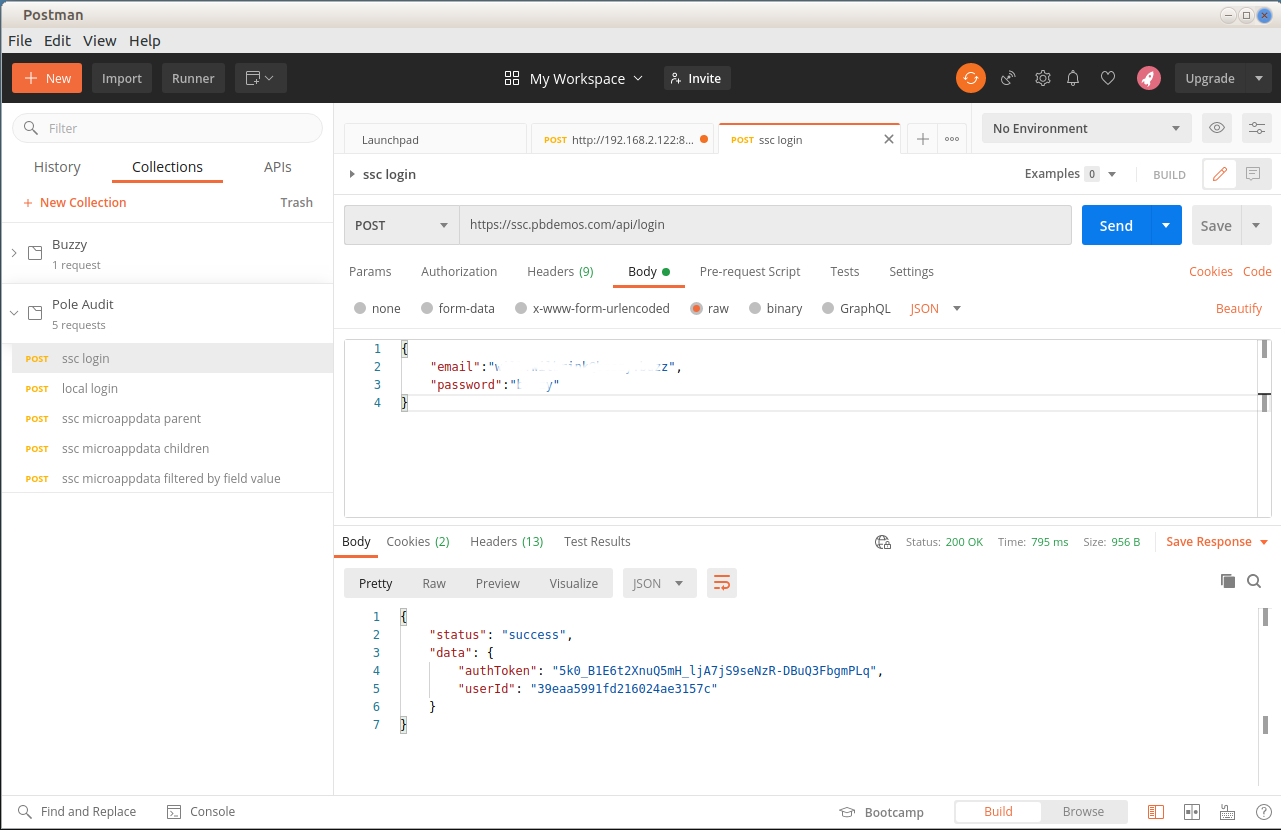
- Begin by creating a new request in postman. Set the request to POST and the url to yourserver/api/login. Set the body:
{
 "email":"my-email@buzzy.buzz",
 "password":"my-password"
}
Click Send. The result should be a user id and token.
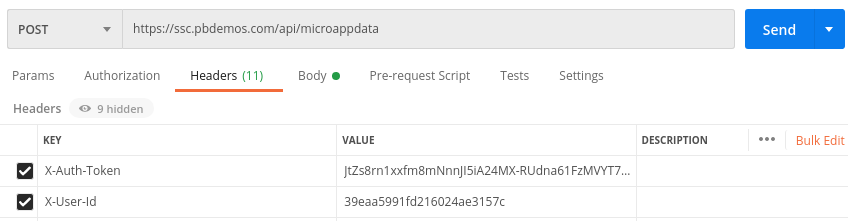
- Now lets create a request to get the records from a Microapp. Create a new request in postman. Set the request to post and the url to yourserver/api/microappdata. Set two header key value pairs: X-User-Id and X-Auth-Token to the values returned in step 1.
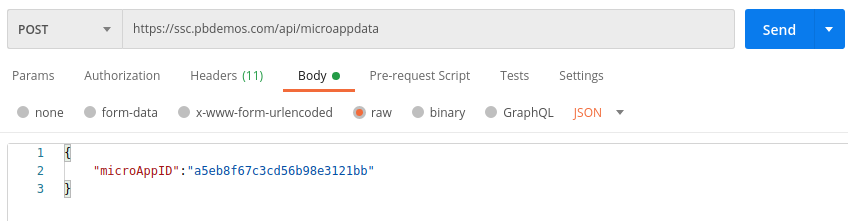
Add the Microapp id to the body:
{
	"microAppID":"<insert microapp id here>"
}
The microAppId can be found by opening the Microapp in a browser and viewing the properties.
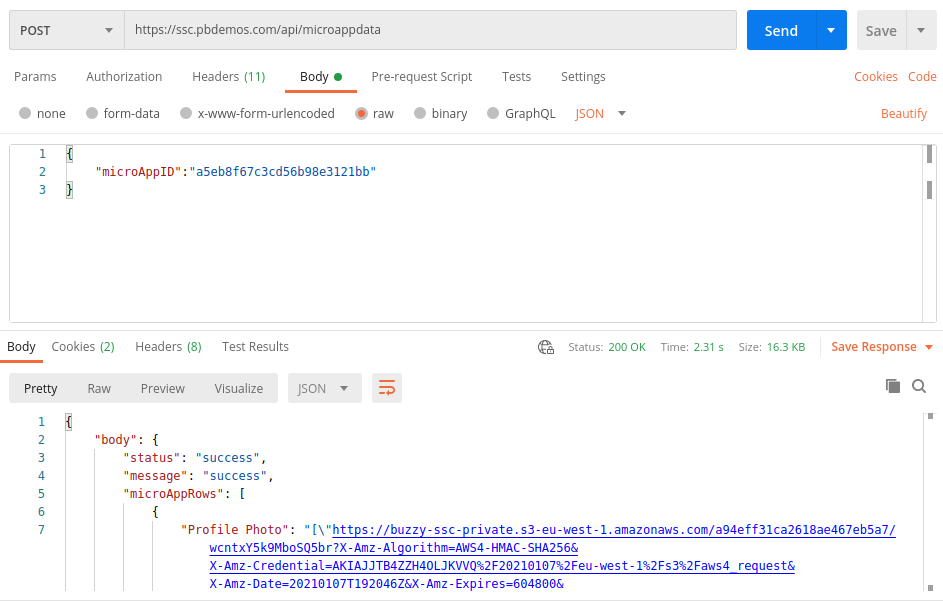
Click Send, the result should be records from the Microapp best viewed as JSON.
Note that embedded microapps are queried using this same endpoint. The body of the request contains the association:
{
    "microAppID": "<insert microapp id here>",
    "searchFilter": [
        {
            "resourceID": "<insert microapp id here>",
            "embeddingRowID": "<insert parent row id here>"
        }
    ]
}
The embeddingRowID has the id for the parent Microapp as well as the row referencing the child.