How to create and connect your Stripe account
To accept payments inside Buzzy, simply connect your Buzzy account to the Stripe payment gateway.
Rather watch this on video? View the explainer here: How to create and connect your Stripe account [Note: Video uses older Buzzy interface, but steps are similar]
Go to your user profile (Browser + Buzzy Classic app: Open left nav drawer (if closed) then click username/avatar button at bottom of left navigation drawer; Buzzy mobile app: Open left nav drawer then hit ‘Profile & Account’ link)
Scroll down.
Click “Payments (Stripe)”.
A green “Connect to Stripe” button will be revealed. Click this to connect to Stripe.
If you already have a Stripe account, simply Sign in with your email and password and your Stripe account will be immediately connected to Buzzy (if this is the case, please jump to image 16).
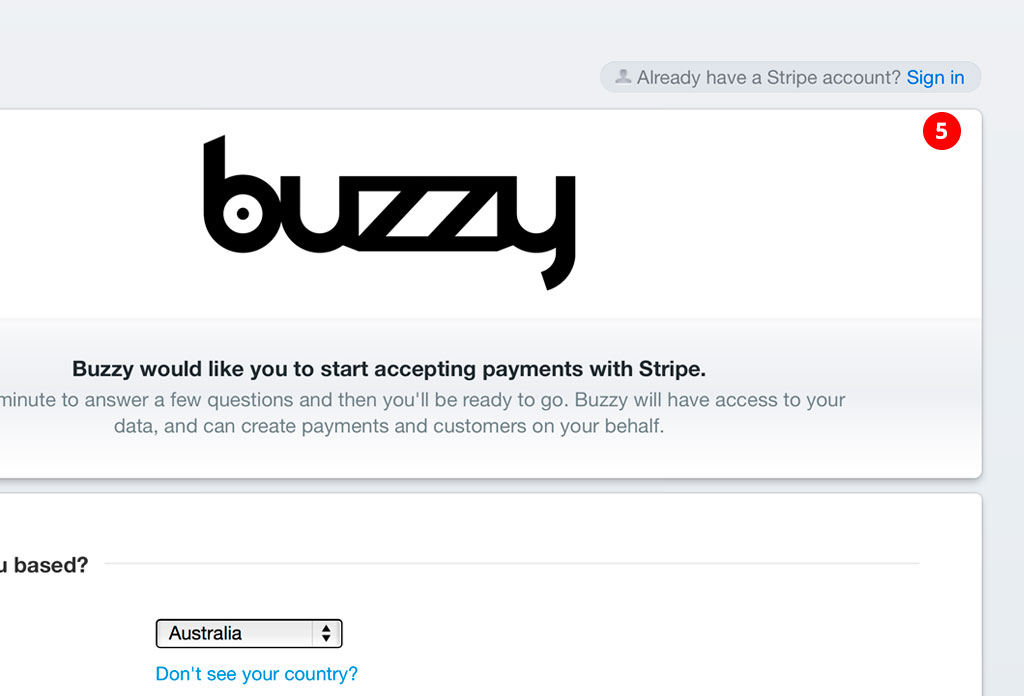
If you do not have a Stripe account, proceed to fill out the Stripe application form.
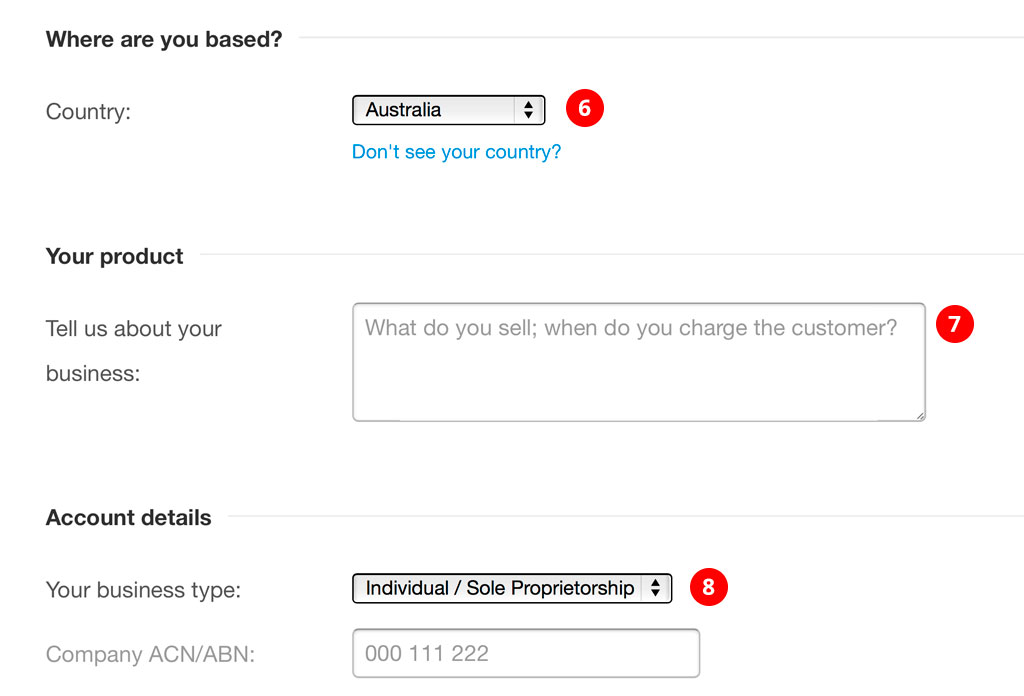
Select the country where your active Bank account is located.
If you are a business you can insert a brief description here of what you plan to sell inside Buzzy, if not and you are an individual simply wanting to accept funds, insert your own description.
Select your business type. Again, you do NOT need to own or operate a business to accept funds inside Buzzy. If you do not own or operate a business, simply select “Individual / Sole Proprietorship”, in this case, a company ACN/ABN is not required.
Insert your business address if you operate a business or a personal home address if not.
If you do not operate or own a business website, simply insert
www.buzzy.buzzas the website address.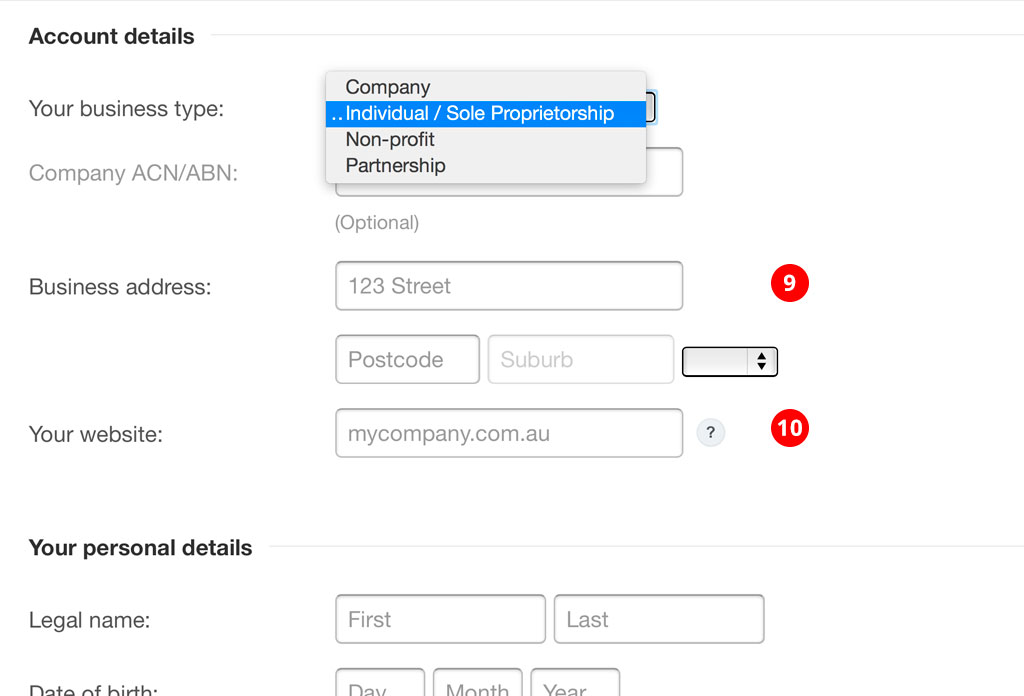
Insert your personal details: Legal name, date of birth and address.
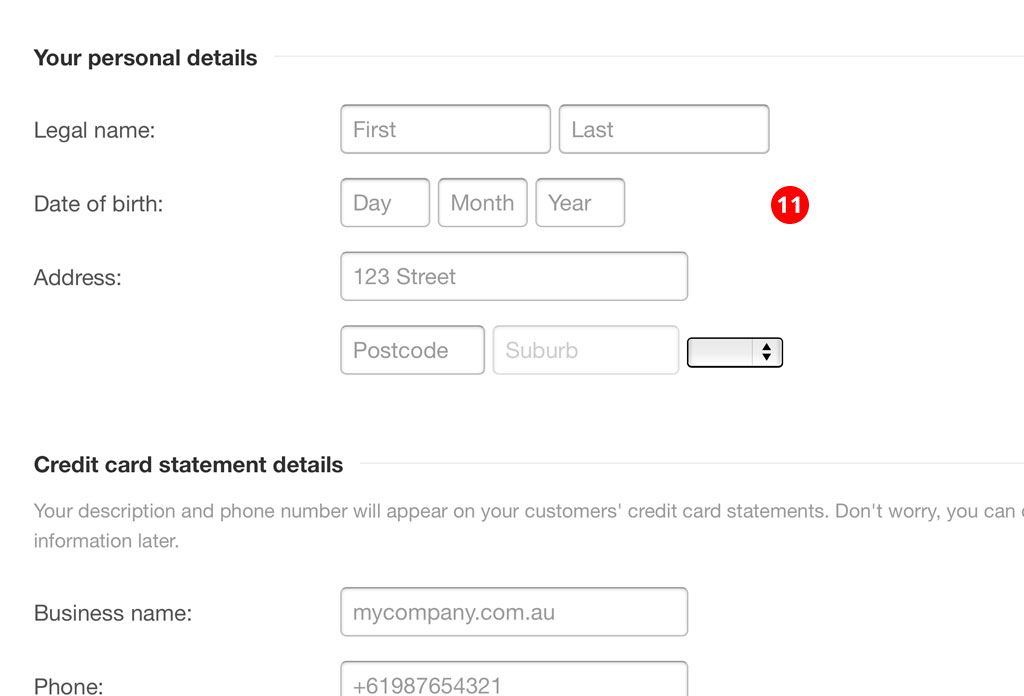
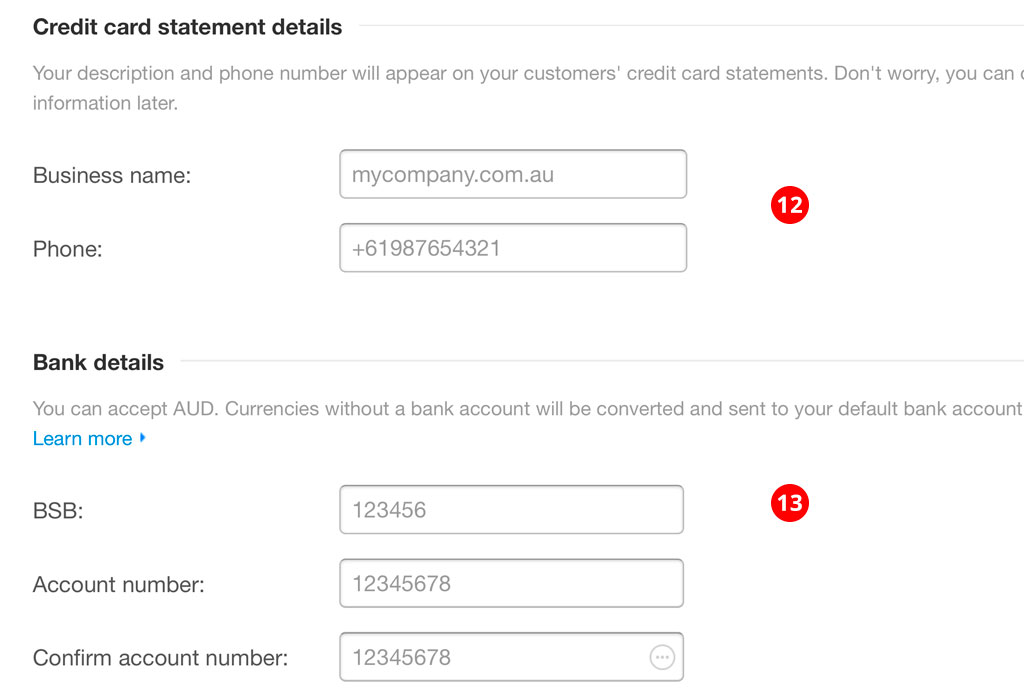
Insert details as they may appear on a credit card statement for the person/s making the payment.
Enter in your correct bank details. Please ensure your bank details are 100% correct.
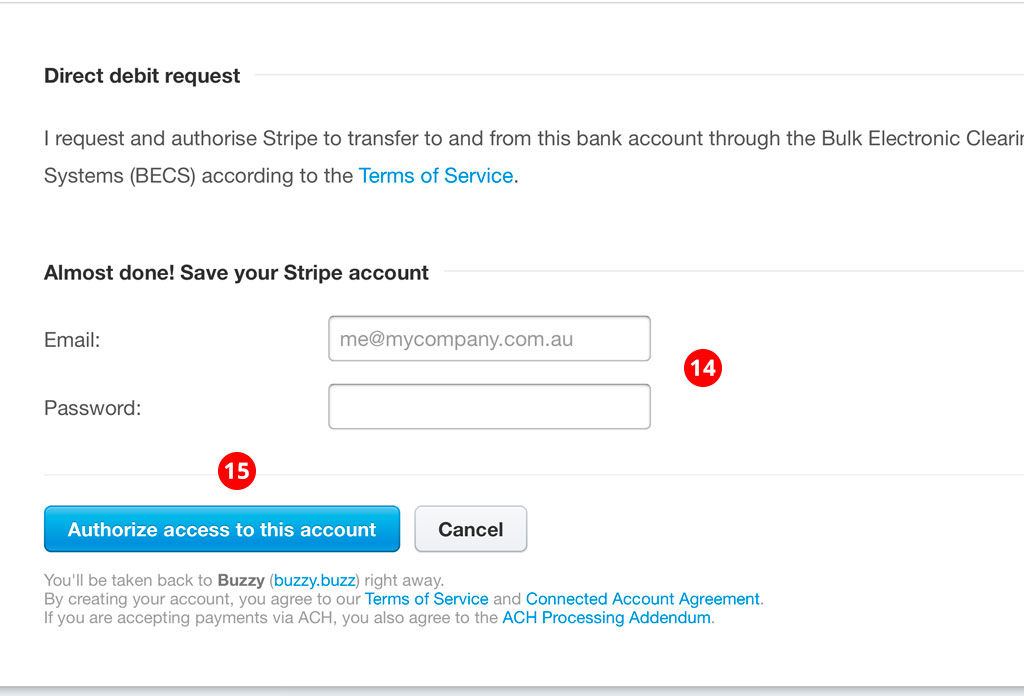
Insert your email address and create a strong password. We recommend a combination of uppercase/lowercase letters, symbols and numbers.
Click “Authorize access to this account”. Once you have clicked this you will be taken back to your Buzzy profile.
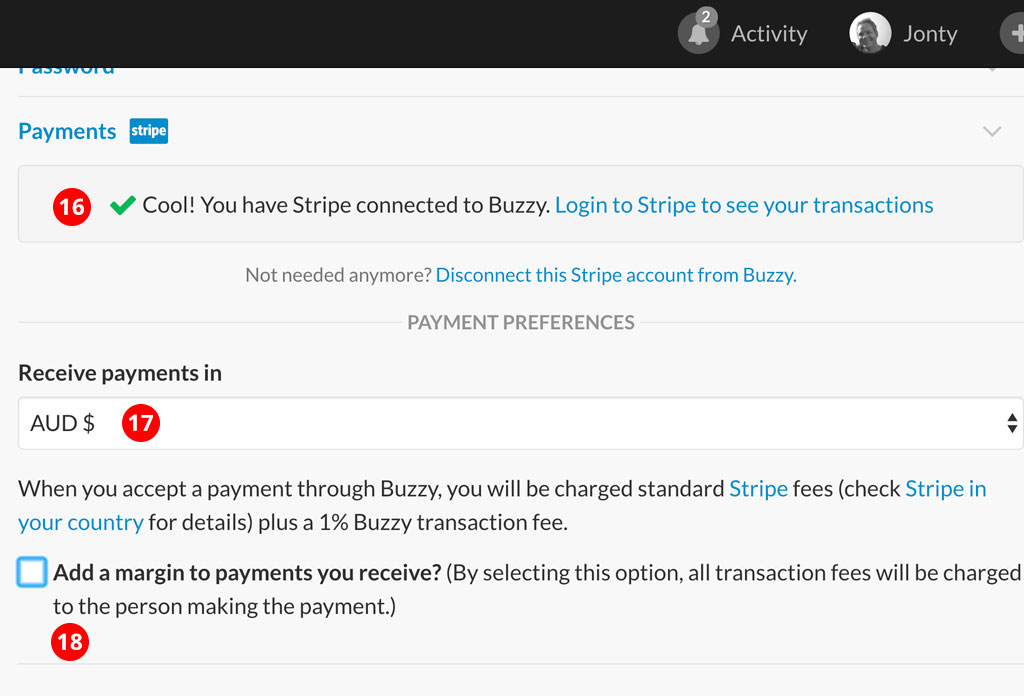
Once you arrive back at your Buzzy profile page, you will see a green tick confirming the connection to Stripe has been successful. You can disconnect your account at any time.
Choose the currency you wish to receive payments.
Decide if you wish to absorb all transaction fees or add a margin to mitigate any associated transaction fees and pass this on to the person making the payments with their credit card.
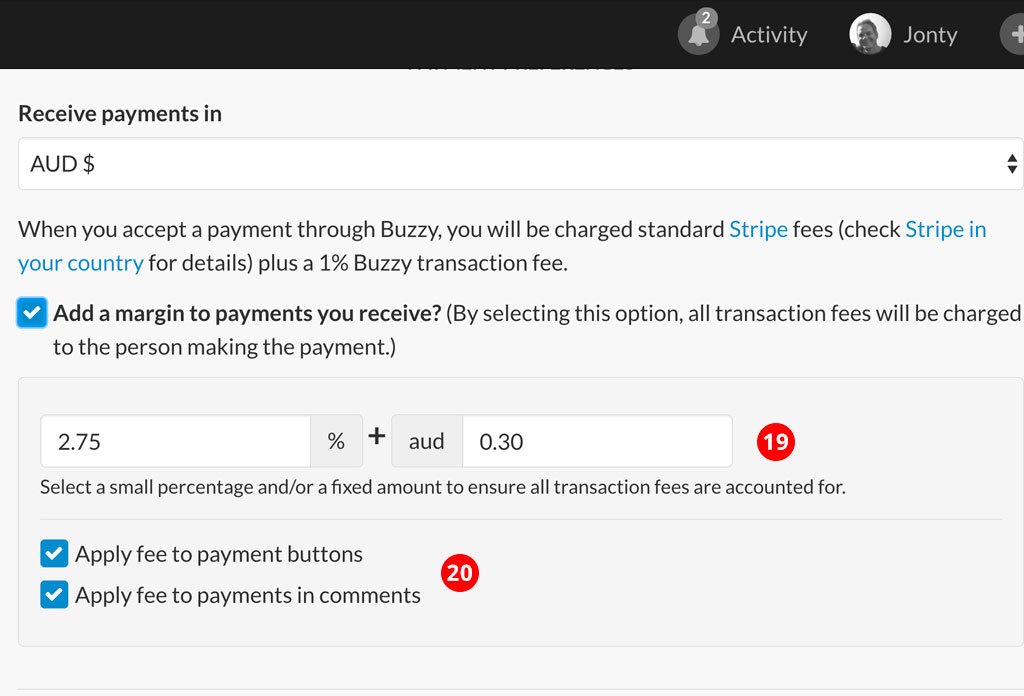
If you decide to add a margin to all payments to mitigate any transaction fees, insert the margin here. Click here to see Stripes credit card fees. Buzzy charges an additional 1% on all transactions that occur inside Buzzy.
Select if you wish to apply this margin to payment buttons you create inside your Buzzes and/or payments you receive inside Buzzy comments.
Rather watch this on video? View the explainer here: How to create and connect your Stripe account