Adding and editing images on a Buzz
Note: As of the Buzzy v5 app (released late July 2019), editing or authoring a Buzz requires the app to be switched to Classic View. This will have the same interface (adjusted for mobile screens) as the browser version of Buzzy, so the steps listed below will be identical.
Note: Are you an Owner or Author? Only participants included in the Buzz as an Owner or Author can edit a Buzz. Click the participants (‘People’) button under the Buzz title, and check if you’re listed as an ‘owner’ or ‘author’ - if not, you won’t be able to edit it.
To add images
- On your Buzz, click the ‘Add content’ button.
- Choose ‘Images’ from the menu.
- Select your local image files.
- A dialog will ask you about the size of the images you need to upload - make a selection (small - large or original) depending on what the images are used for (see note below).
- That’s it!
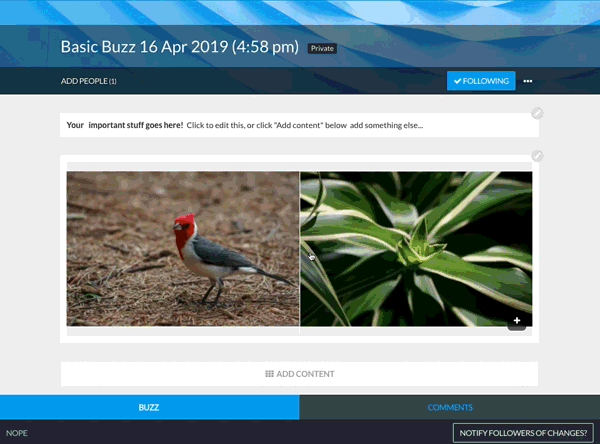
To edit an existing image gallery
- With edit rights to the Buzz you should be able to see a ‘+’ icon in the bottom right of the image.
- Click the plus icon
- A new gallery page/modal should open with the the existing image/s as a grid of thumbnails with an x button in the top right of each, and big + button as the last item.
- Click the ‘x’ icon on each image you want to remove - a dialog/prompt will ask you to confirm the removal. Click o
- Click the big plus button - a dialog will ask you to select a new image to upload.
- Choose your new images
- A dialog will ask you about the size of the images you need to upload - make a selection (small - large or original) depending on what the images are used for.
- Close the gallery via the ‘X’ button top right.
A note on sizing
Buzzy can resize the images when you upload them - that’s the ‘small’, ‘medium’, ‘large’ or ‘original’ setting. Which setting you use depends on the nature of the image and what it will be used for.
- For instance, a quick screengrab or example photo that doesn’t contain a lot of detail, and won’t need to be zoomed, or where speed is critical, use the small or medium setting.
- For most images or normal photos (eg holiday snaps etc), use large.
- For an image that may contain a lot of critical detail, people will zoom in on or may need to print (eg a diagram or instructions etc), use the original setting. In this case you need to balance the image dimensions with the file size due to the fact people will need to receive this file over an internet or data connection. As a recommendation, for a landscape format image (wider than tall), use a width of say 2400px - less if it’s not critical and the image can handle some compression or pixelation artifacts, more if it may need to be printed or people will zoom in a lot - say 3200 or 3600 max.