Export MapInfo Professional CSV and Import into Buzzy
Introduction
MapInfo Professional (MIPro) is a world leading desktop geographic information system. The ability to transfer data to Buzzy offers opportunities for users to work with a low code mobile device platform using data created in MIPro. This document provides a tutorial on exporting data from MIPro and then importing into Buzzy.
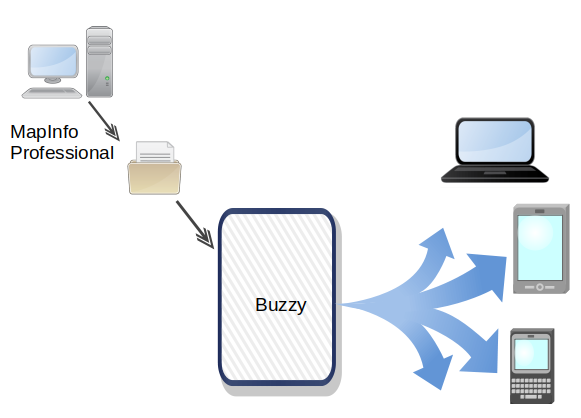
In this scenario, the two systems are not connected in any way. Data is exported using the capabilities of MIPro and imported using the capabilities of Buzzy.
Steps to publish into Buzzy from MIPro:
- Export MapInfo Table to CSV File
- Import CSV file into Buzzy MicroApp
- Add Advanced Map and Add Layer. Configure layer symbology.
Note: MapInfo Professional Workspaces and Symbology are not transferred.
Export Table in MIPro
Only Point data is considered at this time. Use Comma Separated Files (CSV) and geographic data must be in the projection system EPSG:4326. Column names should only be alphanumeric (A-Z 1-9).
- Open the table in MIPro
- If the table does not have a latitude and logitude column in the browser window use the Coordinate Extractor tool.
- Go to Table tab and then click the Export button.
- Specify the export file location. Be sure to choose:
- First row is column headers.
- Comma or tab as the field separator.
- CSV on the file of types.
- Click Save and wait until the export process completes.
Import CSV File into Buzzy
- Create JSONata statement used for import. More information can be found in this Import Data from text file.
- Create Buzz and Microapp. More information can be found in Create your first Microapp.
- Select Microapp Properties. Go to Advanced and Data Source
- Select CSV Import and choose file
- Select Code and paste JSONata statement. More information for JSONata.
- Select Import and wait until import process completes
Add and configure layer in Buzzy
- Add an advanced map to the Buzz
- Select Layers
- Add Layer
- Begin typing Buzz name and select it
- Pick the Microapp
- The Layer symbology can be modified by picking the settings icon, Layers and Pencil icon and then scrolling down to symbols.
Example Import
In this example, we will import a simple comma delimited file exported from MapInfo Professional. The CSV file can be downloaded to your local machine: Text CSV File.
Below is the contents of the file:
"ID","Name","Unit","Street","City","Province","PostalCode","lon","lat"
1,"Bank","","498 Dundas St. W.","Oakville","ON","L6H6Y3",-79.742889,43.46356
2,"Doctor","Suite 104","465 Morden Rd.","Oakville","ON","L6H3W6",-79.69424,43.441805
3,"School","","1430 Trafalgar Rd","Oakville","ON","L6H2L1",-79.698392,43.469125
We want to upload this data into a microapp. We begin by creating a new Buzz and calling it “Import Example”. Add an Application to the Buzz and Name it “Pro Locations”. Publish the Draft. 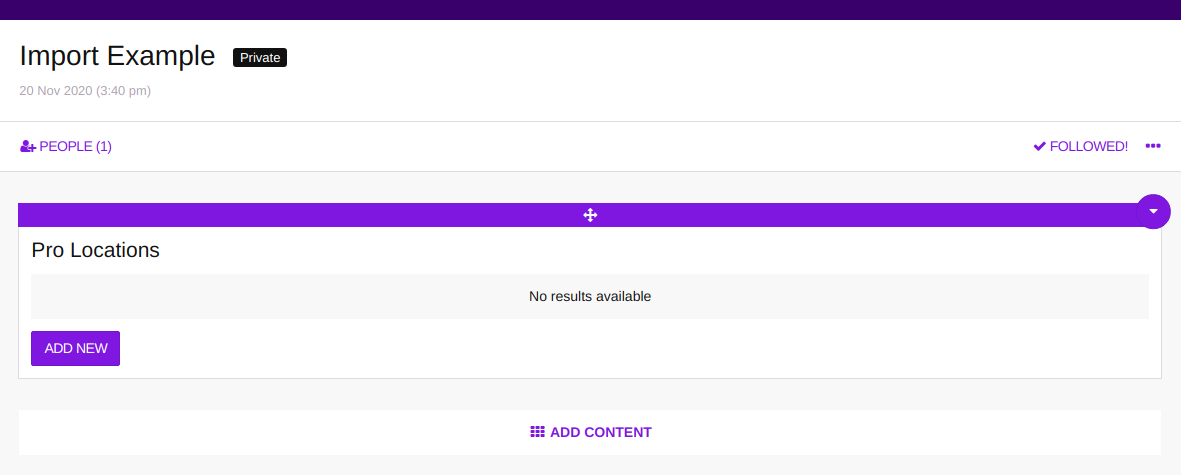
Select the “Pro Locations” microapp and Properties. Select Advanced and then Data Source. Now select CSV import radio button and then UPLOAD CSV button. Choose the example file and it should report that it is complete. Click PREVIEW and you should see some data. 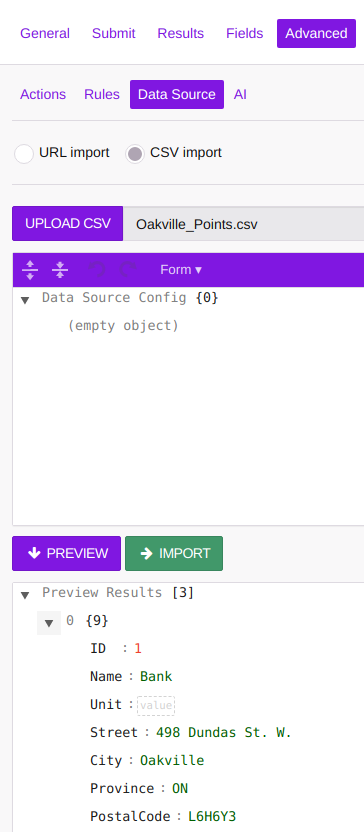
We will now use some JSONata to perform a transformation for upload. Just below UPLOAD CSV is a drop down, change Form to Code. Remove the existing code and then paste in the contents of the JSONata shown below:
{
  "source": {
    "transforms": [
      "$[].data.{
        'Oakville Key': ID ,
        'Oakville Name':Name,
        'Location': {'type': 'Point','coordinates': [lon,lat] ,
        'address': {'formattedAddress': Street &  ($boolean(Unit) ? ',' & Unit : '') & ',' & City & ',' & Province & ',' & PostalCode, 'country': 'CAN',
        'geometry': {'type': 'Point','coordinates': [lon,lat]} }}
      }"
    ]
  },
  "fields": [
    {
      "key": "Oakville Key",
      "type": "string",
      "unique": true
    },
    {
      "key": "Oakville Name",
      "type": "string"
    },
    {
      "key": "formattedAddress",
      "type": "string"
    },
    {
      "key": "Location",
      "type": "GeoJSON"
    }
  ]
}
Then select PREVIEW. You should see this: 
If it looks correct, then select IMPORT. After completing validate the process by selecting the Import Results in the preview pane. You should see 3 records upserted. 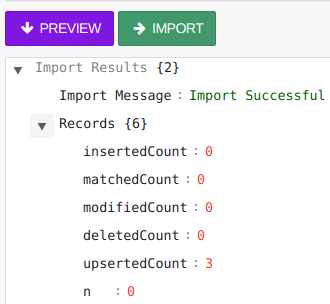
Dismiss the microapp “Pro Locations” properties pane. Add an Advanced Map to the Buzz. Add a Layer using an Existing App: Import Example, Pro Locations. 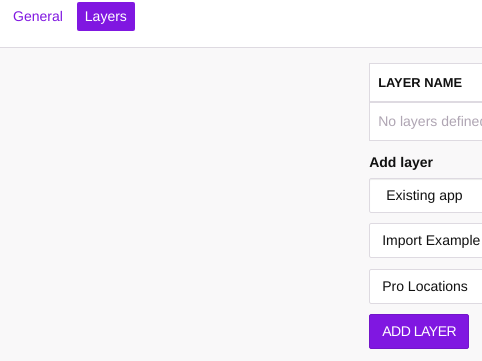
Dismiss the Properties Pane. The Map should appear with the 3 locations: 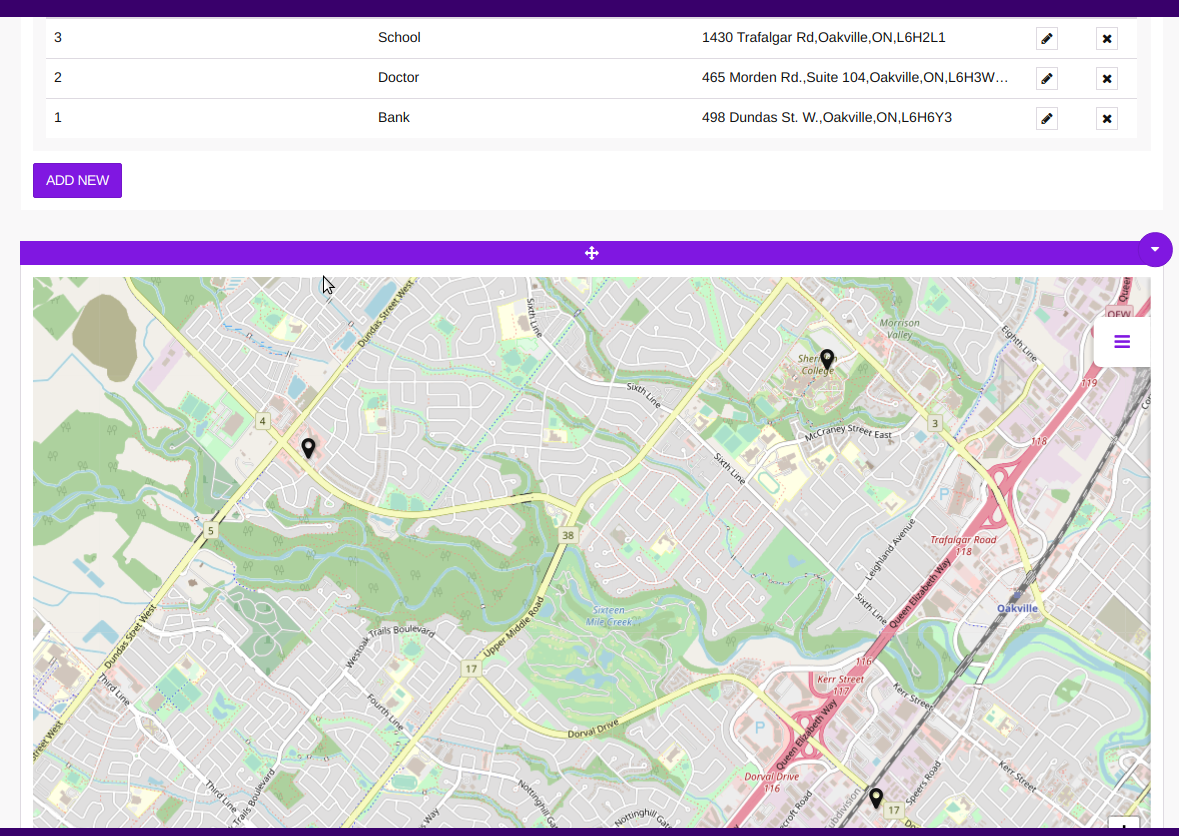
Congratulations, you have imported the MapInfo Professional data into a Buzzy Buzz.