Minikube install guide
Minikube is a lite installation for Kubernetes (K8s). This is a great option for standalone (eg Pre-sales workstation) or low usage environments.
Table of contents
Introduction
The goal of this guide is to allow you to run our own custom implementation of Buzzy on a local system (eg laptop).
The summary of what we’ll be doing:
- Get prerequisites defined/installed ie Docker and Minikube
- Setup Buzzy running on your Minikube environment
- Install NGINX to optionally allow external access to your local Buzzy server - for example, allowing a mobile phone to connect to the local Buzzy server
Prequisites - Docker & Minikube
Ensure you have a computer with enough disk space - eg 10GB space, obviously, size of files on the server like Map Tiles Caches etc should be taken into account.
- You will need to be able to setup 2 DNS entries:
- External IP - Where ever you see
buzzydev1.buzzy.buzzin the settings/documentation. This will be the IP address of the server/aka your dev machine that is accessible by users on the network. For example if this is a192.168.x.yaddress of your machine and your device/phone is on the same WIFI in the same subnet. - Internal IP represented by
buzzydev1.buzzy.buzzin the settings/documentation. You’ll get this for thebuzzy-serviceonce you have completed the K8s/Minikube setup below.
- External IP - Where ever you see
- Setup an account on docker.com and contact the Buzzy team with the username, so you can get secure access to the docker images
- Install Docker - recommend install Docker Community Edition - please follow the instructions for your specific operating system
- Install Minikube - see the Getting Started Guide for instructions on installing Minikube for you operating system
- Run
minikube start- this will start your local Minikube environment. You should be able to verify your Minikube has started by running a command likekubectl get po -Aand get a list of processes running.minikube statuswill give you the status. - Get the K8s dashboard running: (see here for more info)
minikube dashboard- this will open your minikube dashboard in your local browser and you should be - Optional - if you intend to access the server from another device, then you need to have a way to define a domain name for the service. There are lots of ways to do this eg editing individual hosts files on each device. On mobile devices, this can be harder. Setting up an external DNS that points to the internal IP addresses is one simple solution. Other solutions include setting it up as part of your local WIFI network.
Setting up Buzzy on Minikube
- Clone/download the Buzzy Docs repo - so you can get copies of all the relevant files to install and run Buzzy on your Minikube. Once the repo is cloned/downloaded (upzipped) to your local machine is running, in
Terminalgo into yourbuzzy-docsrepo/directory and change into theminikube/samplesdirectory/folder. - Create a custom namespace (eg
buzzyor whatever you’d like to call your service):kubectl create namespace buzzy; on success you should seenamespace/buzzy created. We’ll use this namespace to help separate the Buzzy related services on the K8s system. If you refresh your Minikube dashboard URL (setup above) you should new see the name space listed in the dashboard console. - Create a
docker-registrysecret with your username/password so can access the docker images mentioned above. Replace thebuzzynamespace with your name space you defined:kubectl create secret docker-registry dockerhub --docker-server=docker.io --docker-username=<username> --docker-password=<password> --docker-email=<email> --namespace=buzzyOnce created you should get the success messagesecret/dockerhub created. In you K8s Dashboard screen you can now select the namespace and on theOverviewpage you should see your secret that has been created. - Now we’re going to enable an ingress, which controls access to the relevant service. In Terminal, execute:
minikube addons enable ingress. You should see the success messageingress was successfully enabledand if you execute the commandminikube addons listyou should see it’s enabled:Adams-MacBook-Pro:minikube adamginsburg$ minikube addons list - addon-manager: enabled - dashboard: enabled - default-storageclass: enabled - efk: disabled - freshpod: disabled - gvisor: disabled - helm-tiller: disabled - ingress: enabled - ingress-dns: enabled - logviewer: disabled - metrics-server: disabled - nvidia-driver-installer: disabled - nvidia-gpu-device-plugin: disabled - registry: disabled - registry-creds: disabled - storage-provisioner: enabled - storage-provisioner-gluster: disabled - Edit your
buzzy.yamlfile to reflect your settings.Variable Info Example ROOT_URL External url to your server/machine eg. `https://buzzydev1.somedomain.com` MONGO_URL URL to mongo service. In this example it's already setup in Minikube, however this could be changed to point to another Mongo DB instance on the cloud or elsewhere. METEOR_SETTINGS This must be a string that interprets to valid JSON object. Meteor.settingsvaliables that are not underpublicare visible to the server only. Anything underMeteor.settings.publicwill be visible to the client: browser, phone, tablet etc. Be careful not provide any secret confidential settings underpublicSee below for specific settings. Please go through each of the settings and fill out as best as possible. Variable Info Example Meteor.settings.jwtSecret Set this to a long eg 30+ character random string. IT will be used for encoding JWT secrets on the server Now we need to run the relevant YAML files that will setup the relevant services. Inside your
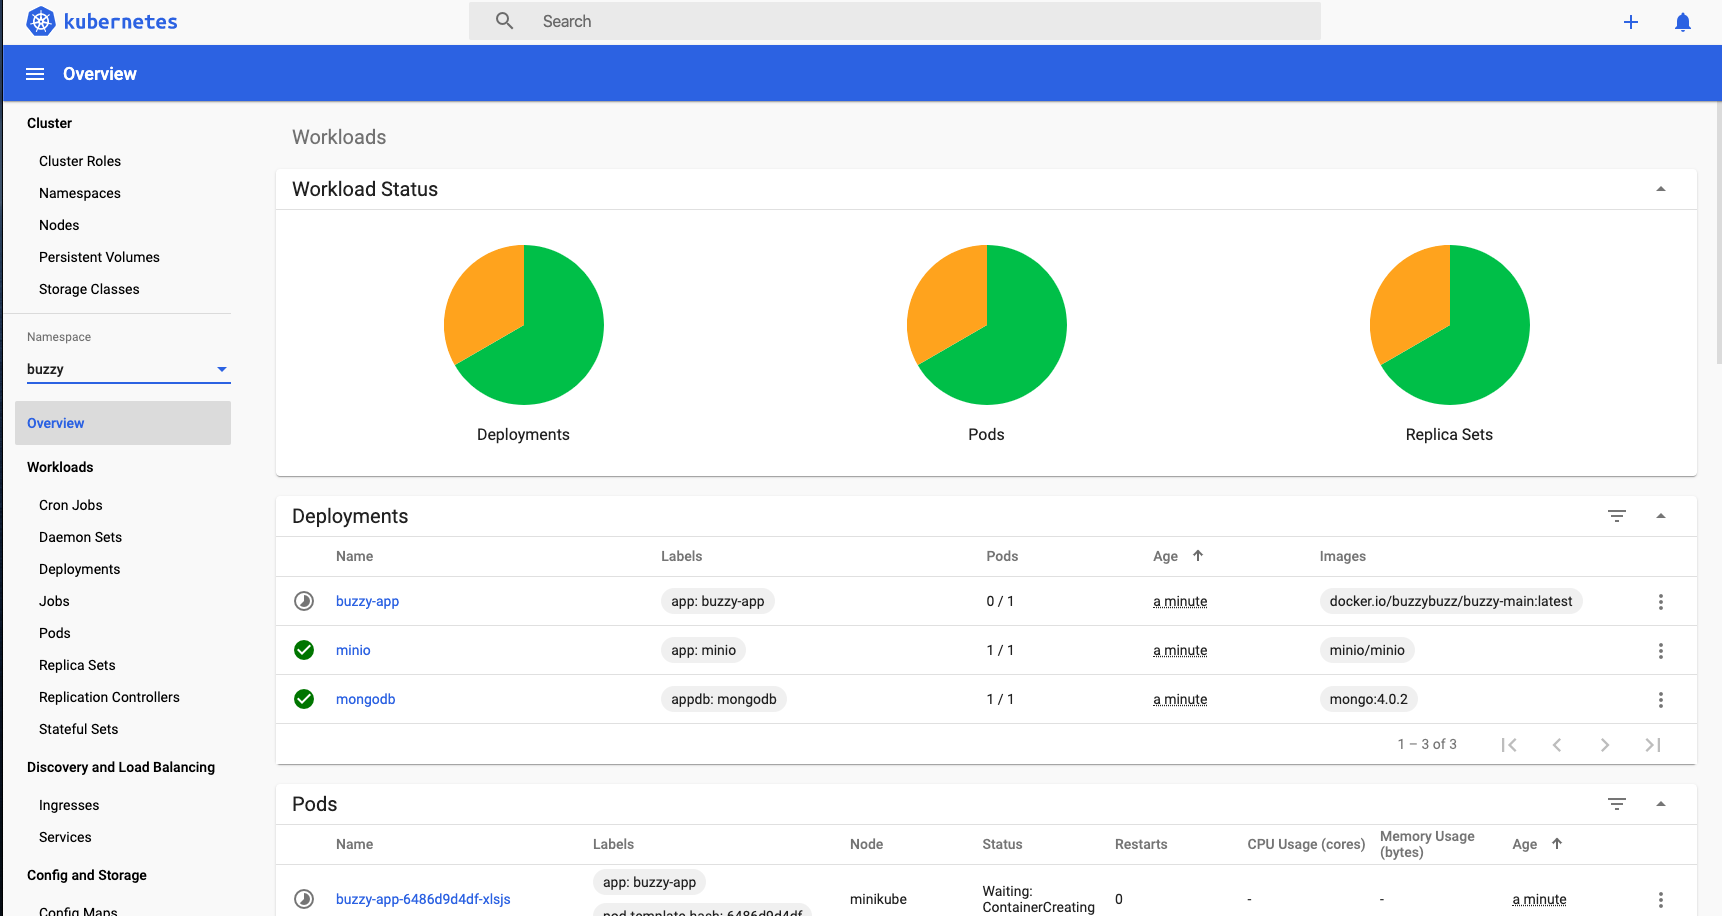
buzzy-docs\minikubedirectory/folder you’ll see a lot of yaml files. You can run these one by one or as a batch by runningapply_all.sh. If you get a permission denied error when trying to rule./apply_all.shthen in Terminal do achmod u+x apply_all.shand try and run again. If run successfully you should see something like:Adams-MacBook-Pro:minikube adamginsburg$ ./apply_all.sh persistentvolume/task-pv-volume created persistentvolumeclaim/mongo-pv-claim created deployment.apps/mongodb created service/mongo-service created persistentvolume/buzzy-minio created persistentvolumeclaim/minio-pv-claim created deployment.apps/minio created service/minio-service created ingress.extensions/minio created deployment.apps/buzzy-app created service/buzzy-service created ingress.extensions/buzzy-ingress createdYou should be able to see the deployments starting successfully in your Minikube dashboard. Note, it may take some time to download and start some fo your services. For trouble shooting, see below.
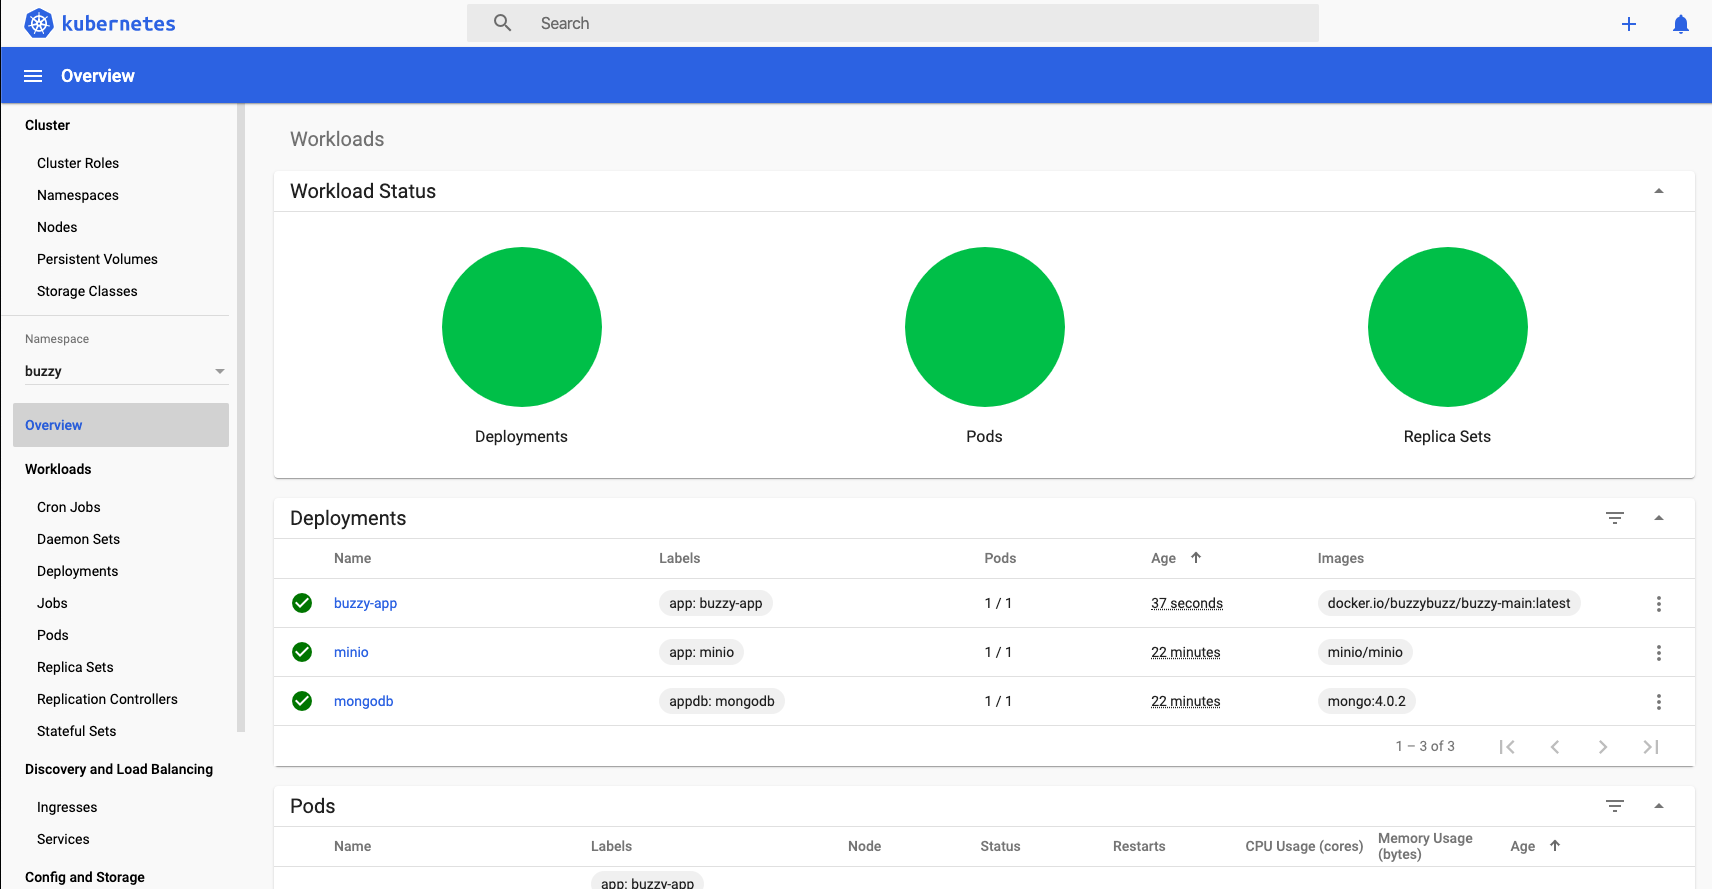
In the terminal type minikube service buzzy-service --url -n buzzy this will give you something like http://192.168.64.9:31836 and if you plug that into a browser you should see the login page… YAY!!! 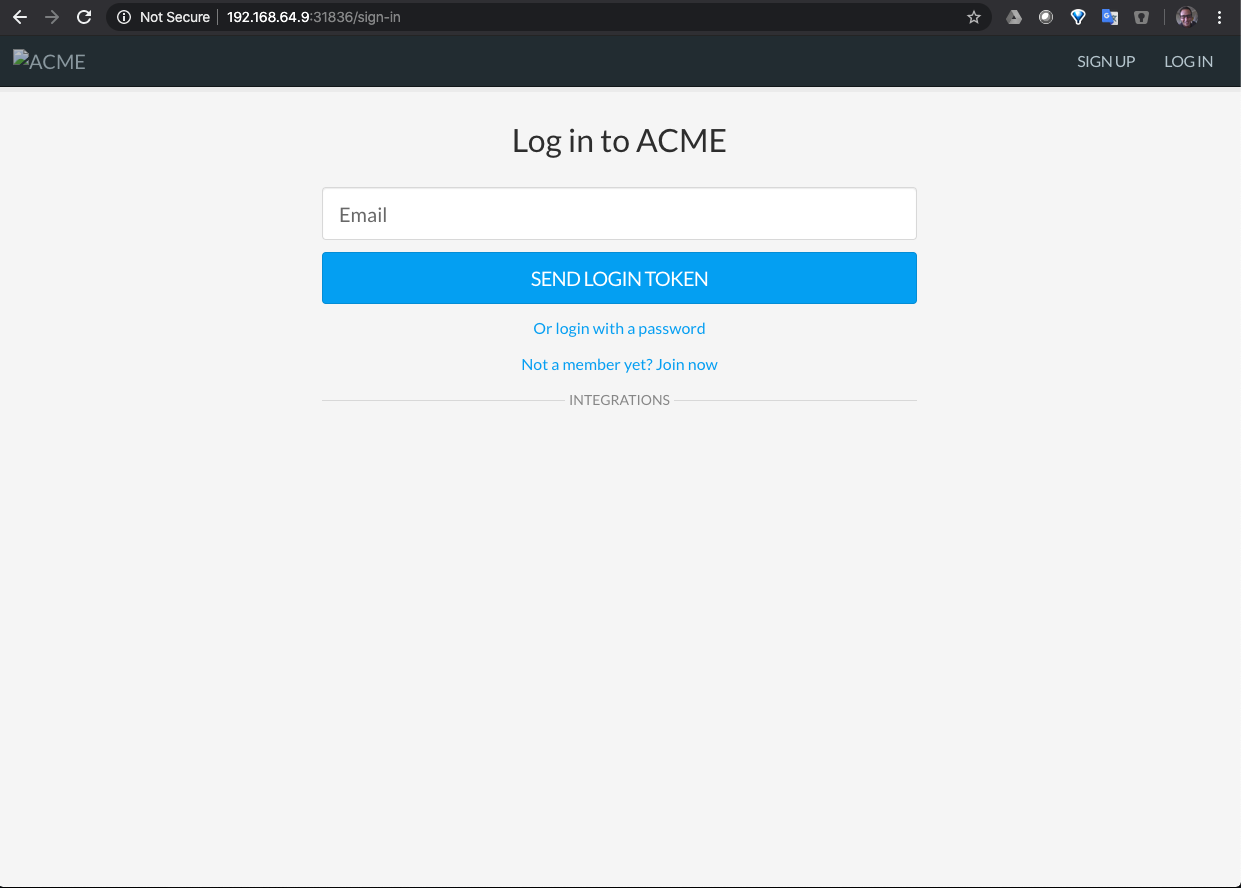
That means Buzzy is up and running on the internal Minikube environment.
- Now we need to make your local Buzzy server available to the outside world, so that other computers/devices can access it. This is an optional step, as you can already access you server from you machine. If you don’t need external access you can stop here. Firstly we’re going to create a Minikube tunnel - open a new terminal tab and type
minikube tunnel. You should now be able to access your server in the browser from itsCluster IPwhich can be found underServicesin the K8s Dashboard. The next step is passing external network traffic to the Minikube ingress and services. For this we’ll use NGINX. Note there will be other ways to do this, but this is one that works. Please install NGINX which will give access to your computer and the Minikube services to the outside world. Next we’ll need to edit the NGINX conf file to pass traffic to the server. Find your default NGINX file and make it look like , replacing
buzzydev1.buzzy.buzzwith your external DNS entry that points to you machines IP andbuzzydemo.buzzy.buzzwith your internal DNS entry for your ingress.#user nobody; worker_processes 1; #error_log logs/error.log; #error_log logs/error.log notice; #error_log logs/error.log info; #pid logs/nginx.pid; events { worker_connections 1024; } http { include mime.types; default_type application/octet-stream; log_format main '$remote_addr - $remote_user [$time_local] "$request" ' '$status $body_bytes_sent "$http_referer" ' '"$http_user_agent" "$http_x_forwarded_for"'; access_log /usr/local/etc/nginx/logs/access.log main; error_log /usr/local/etc/nginx/logs/error.log; sendfile on; #tcp_nopush on; #keepalive_timeout 0; keepalive_timeout 65; #gzip on; server { listen 80; server_name buzzydev1.buzzy.buzz; #charset koi8-r; access_log /usr/local/etc/nginx/logs/host.access.log main; location / { proxy_http_version 1.1; proxy_set_header Upgrade $http_upgrade; proxy_set_header Connection "upgrade"; proxy_redirect off; proxy_buffer_size 256k; proxy_buffers 8 256k; proxy_busy_buffers_size 512k; proxy_pass_request_headers on; proxy_set_header Host $host; proxy_set_header X-Real-IP $remote_addr; proxy_set_header X-Forwarded-For $proxy_add_x_forwarded_for; proxy_pass http://buzzydemo.buzzy.buzz; } #error_page 404 /404.html; # redirect server error pages to the static page /50x.html # error_page 500 502 503 504 /50x.html; location = /50x.html { root html; } # proxy the PHP scripts to Apache listening on 127.0.0.1:80 # #location ~ \.php$ { # proxy_pass http://127.0.0.1; #} # pass the PHP scripts to FastCGI server listening on 127.0.0.1:9000 # #location ~ \.php$ { # root html; # fastcgi_pass 127.0.0.1:9000; # fastcgi_index index.php; # fastcgi_param SCRIPT_FILENAME /scripts$fastcgi_script_name; # include fastcgi_params; #} # deny access to .htaccess files, if Apache's document root # concurs with nginx's one # #location ~ /\.ht { # deny all; #} } # another virtual host using mix of IP-, name-, and port-based configuration # #server { # listen 8000; # listen somename:8080; # server_name somename alias another.alias; # location / { # root html; # index index.html index.htm; # } #} # HTTPS server # #server { # listen 443 ssl; # server_name localhost; # ssl_certificate cert.pem; # ssl_certificate_key cert.key; # ssl_session_cache shared:SSL:1m; # ssl_session_timeout 5m; # ssl_ciphers HIGH:!aNULL:!MD5; # ssl_prefer_server_ciphers on; # location / { # root html; # index index.html index.htm; # } #} include servers/*; }
Now run NGINX ex - eg on mac sudo nginx and if you need to stop it sudo nginx -s stop
Trouble shooting
Trouble shooting: For example if the buzzy service has not started:
Find the pod or service that’s failing in the Dashboard. In the Terminal type kubectl logs <ID of the pod/service buzzy-app-59d9d786dc-kbsdx>
This should show you some logs, that will help you debug the specific issue. It’s probably going to be an issue in the buzzy.yaml file.
Stop the specific service, for example to stop the buzzy service kubectl delete -f ./8_buzzy.yaml, you should see the service disappear from the K8s dashboard. Then fix the YAML and just reload/apply that specific YAML, for example: kubectl apply -f ./8_buzzy.yaml and check the Dashboard to see if there service has started successfully.
Debugging mongo
Login in to the mongodb pod with something like kubectl exec -it mongodb-758868b55b-5mj2k -n buzzy bash
That should give you a shell into the Mongo pod. Now type mongo, which should open a mongo shell. Type help for mongo shell commands eg show dbs and you should see a buzzy db. You can then use buzzy and perform queries and updated from the console.